Hardness testing on smallest scales: New micro- and nanoindenter at the Fraunhofer IST

In recent decades, the demands placed on materials and their properties have increased enormously: Even for ultrathin coatings, it must be possible to unambiguously determine the hardness and the modulus of elasticity, for example. One common method of hardness testing is nanoindentation, which is also applied at the Fraunhofer IST. The existing range of possibilities at the institute has recently been significantly extended by a new nanoindenter.
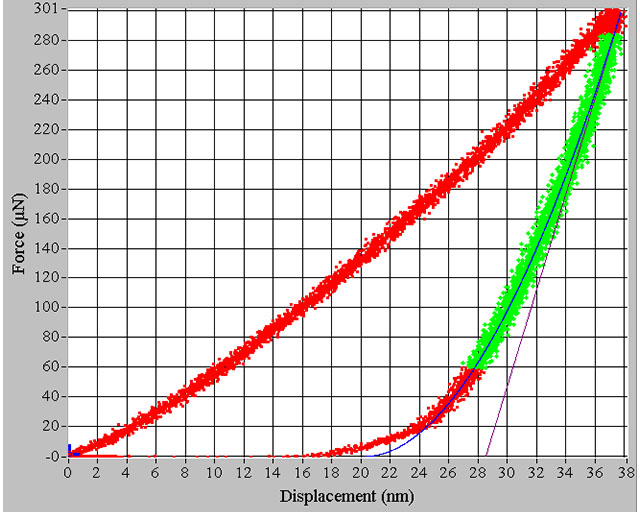
A nanoindenter is deployed in order to determine the hardness, the modulus of elasticity and, if necessary, the viscoelastic properties of materials and thin films. This is performed by pressing a three-sided diamond tip into the surface in a controlled manner whilst continuously recording – with the highest precision – the necessary force and the penetration depth. From the measurement curves, the hardness and the modulus of elasticity of the material can then be determined - in some cases in dependence on the depth.
Extension of nanoindentation
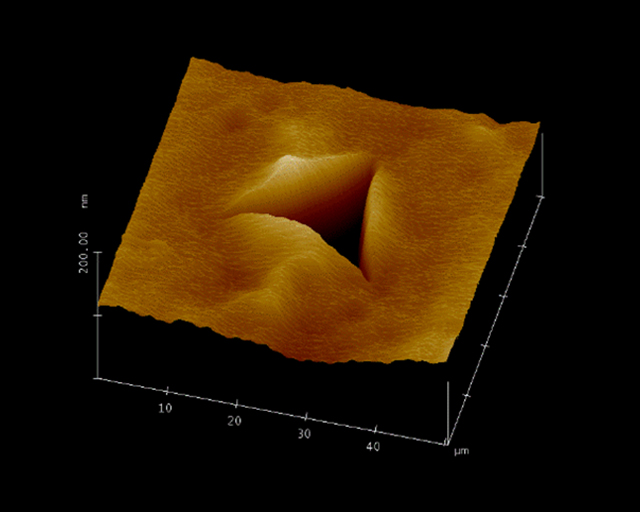
By means of the AFM mode, the surfaces can be imaged topographically both prior to and following indentation with the aid of the diamond tip, thereby enabling, for example, the exact position of an indentation to be verified retrospectively.
One special feature is calibration to the hardness of a reference material, which – in contrast to the common calibration to the modulus of elasticity – has the following advantages:
- better reproducibility of hardness values
- better independence of the measurements from the indentation depth
- smaller integral error for hardness and elasticity, even with successive wear of the tip throughout its lifetime.
Furthermore, nano-scratch tests and wear tests can also be carried out with the aid of the scratch module.
Advantages of the new device
Compared to the existing capabilities for hardness determination at the Fraunhofer IST, the new indenter device offers a number of advantages:
- With the aid of the new nanoindenter, fully automated measurements of multiple samples can be performed, even with different sample heights and geometries.
- The broad measurement spectrum ranging from high loads (1N) to very small loads (1µN) allows the investigation of solid materials and thick layers as well as very thin layers down to a few hundred nanometers.
- Force-modulation techniques can be applied in order to determine the depth dependence of the hardness or the influence of the substrate - in one single measurement.
- By means of frequency modulation techniques, time-dependent phenomena can be determined, e.g. in polymers (storage and loss modulus).
- Ultrafast measurements of up to 0.6 seconds per measuring point allow the mapping of the hardness and the modulus of elasticity, i.e. the representation of the lateral distribution of non-homogeneous mechanical properties on the micrometer scale. These can be e.g. precipitates in steels, different phases in polymers, multiphase materials, nitriding hardness profiles, etc.
The application possibilities
Hardness and modulus of elasticity are important parameters for all types of surfaces which are exposed to mechanical stress. These can be, for example, tribological protective coatings on milling cutters, tools, automotive components or machine elements, as well as paints, electroplating coatings, decorative coatings (scratch resistance) and nitrided or borated surfaces, display glass, etc.

